Color Banding: Causes, Fixes & Glitch Art Uses
Color banding is a visual artifact where smooth gradients break apart into distinct, visible steps of flat color — staircases where there should be ramps. In conventional digital imaging, it’s a flaw to be corrected. In glitch art, it’s a powerful tool for revealing the hidden mathematics of color representation and creating bold, graphic aesthetics from photorealistic source material.
Banding occurs whenever there aren’t enough color values to represent a smooth transition. Whether that shortage comes from low bit depth, heavy compression, aggressive color grading, or deliberate manipulation, the visual result is the same: the illusion of continuous tone breaks down, and the discrete, quantized nature of digital color becomes visible.
Understanding color banding means understanding how digital images store color — and knowing exactly where to apply pressure to make the system crack.
What Causes Color Banding
Bit Depth and Color Resolution
Every pixel in a digital image stores its color as a number. The bit depth determines how many distinct values are available for each color channel:
| Bit Depth | Levels Per Channel | Total Colors | Banding Visibility |
|---|---|---|---|
| 8-bit | 256 | 16.7 million | Visible in gradients |
| 10-bit | 1,024 | 1.07 billion | Rare, only extreme cases |
| 16-bit | 65,536 | 281 trillion | Essentially invisible |
Banding becomes visible when a gradient spans a range of tones using too few digital steps. An 8-bit gradient from dark blue (RGB 0, 0, 40) to medium blue (RGB 0, 0, 120) has only 80 discrete values to work with. If that gradient fills a large area of the image, the eye perceives the boundaries between adjacent steps as hard edges.
The math is straightforward: take the pixel width of your gradient area, divide by the number of available color steps. If the result exceeds roughly 2–3 pixels per step, banding becomes perceptible. A 1920-pixel-wide gradient with 80 available steps means each band is 24 pixels wide — clearly visible.
JPEG and Lossy Compression

JPEG compression introduces banding through two mechanisms:
Quantization — JPEG divides the image into 8x8 pixel blocks and discards color detail the algorithm considers imperceptible. At low quality settings, this throws away the subtle differences between similar colors that make gradients appear smooth.
Chroma subsampling — Most JPEG encoding reduces color resolution to half or quarter the luminance resolution (4:2:0 or 4:2:2 subsampling). Color transitions have even fewer steps to work with than brightness transitions, causing chromatic banding in areas where hue shifts gradually.
Each generation of JPEG re-saving compounds the damage. See generational loss for how repeated compression degrades images systematically.
Color Grading and Post-Processing
Even images that start with sufficient color depth can develop banding through editing:
- Lifting shadows or crushing blacks in Lightroom or Photoshop maps a narrow range of input values across a wider output range, stretching the available steps until gaps appear
- Heavy curve adjustments pull apart closely-spaced values, revealing quantization gaps that were invisible before the adjustment
- Gradient maps and color LUTs remap the entire tonal range, which can cluster values together in some regions while spreading them thin in others
- Converting from higher to lower bit depth (16-bit working file exported as 8-bit JPEG) discards the intermediate values that kept gradients smooth
Gamma Correction and Rounding Errors
Digital images use gamma encoding to allocate more of the available bit depth to dark tones (where the eye is most sensitive). When software performs color operations — blending layers, applying curves, compositing — it must convert between gamma-encoded and linear color space. Each conversion introduces rounding errors that accumulate across multiple operations, gradually stripping the smoothness from gradients.
This is why images edited through many adjustment layers often develop banding even when the individual corrections are subtle. The cumulative rounding eats away at precision.
Display Limitations
Some banding is a display problem, not a file problem:
- 6-bit panels (common in budget monitors and many laptops) display 262,144 colors. They simulate 8-bit color through temporal dithering (rapidly flickering between adjacent values), but this simulation breaks down in smooth gradients, especially at low brightness.
- 8-bit monitors sometimes band in very dark or very bright regions where the panel’s response curve compresses available steps.
- 10-bit displays with a proper 10-bit signal path virtually eliminate perceptible banding for standard content.
Where Banding Appears Most
Not all images band equally. Certain conditions concentrate the effect:
Blue sky and atmospheric gradients — The classic banding victim. Clear skies contain extremely subtle color transitions across large areas, precisely the conditions where 8-bit quantization fails. Blue is also the noisiest channel in most camera sensors, so noise reduction — which removes the natural dithering of sensor noise — makes banding worse.
Low-light and shadow regions — Digital sensors and displays both compress tonal resolution at low brightness levels. A dark gradient that appears smooth on a calibrated monitor may band visibly on a consumer display.
Synthetic gradients — Computer-generated gradients (CSS backgrounds, Photoshop gradient fills, 3D renders) are mathematically perfect, containing zero noise. Natural photographs have sensor noise that acts as accidental dithering. Synthetic images lack this built-in disguise.
Out-of-focus backgrounds — Shallow depth of field smooths background detail into gradients, creating large-area transitions that reveal banding. Bokeh areas in 8-bit compressed images are prime banding territory.
HDR tone-mapped images — Mapping high dynamic range data into standard range often produces banding in recovery zones where the tone mapping curve stretches narrow data ranges across wide output ranges.
How to Fix Unwanted Banding
When banding appears in conventional work, several approaches can eliminate or reduce it.
Work in Higher Bit Depth
The most effective prevention. Edit in 16-bit mode in Photoshop (Image > Mode > 16 Bits/Channel) or shoot in RAW format, which typically provides 12–14 bits of tonal data. Perform all color grading and curve adjustments at full bit depth, then convert to 8-bit only for final export.
Add Dithering
Dithering introduces subtle noise that breaks up the visible boundaries between color steps. The noise scatters pixel values across adjacent bands, tricking the eye into perceiving smooth transitions.
In Photoshop:
- Add a new layer above your image
- Fill with 50% gray
- Apply Filter > Noise > Add Noise (1–3%, Gaussian, Monochromatic)
- Set the layer blend mode to Overlay or Soft Light
- Reduce opacity to taste (10–30% is usually sufficient)
In export settings: When saving as PNG, enable dithering. Photoshop’s “Save for Web” offers diffusion, pattern, and noise dithering options that reduce banding in 8-bit exports.
Why dithering works: The scattered noise breaks up the straight horizontal boundaries between color bands. Our visual system (see Mach banding section below) is wired to detect and amplify straight edges — dithering destroys those edges while preserving the overall tonal impression.
Minimize Re-Compression
Every JPEG save introduces additional quantization. Export from your source file at the highest quality practical for your use case. If you must re-edit a JPEG, convert to 16-bit immediately on opening to give yourself headroom for adjustments.
Adjust Curves Gently
Aggressive tonal adjustments are the most common editing cause of banding. Use multiple gentle corrections rather than one dramatic curve. Adjustment layers in Photoshop allow you to spread corrections across several layers with reduced intensity each, minimizing the rounding damage per operation.
Avoid Blur as a Fix
Blur might initially seem to smooth banded transitions, but it actually reduces the number of distinct tones in the affected area. The blurred region has fewer unique values than the original, and applying color corrections afterward — even gentle ones — can produce worse banding than you started with.
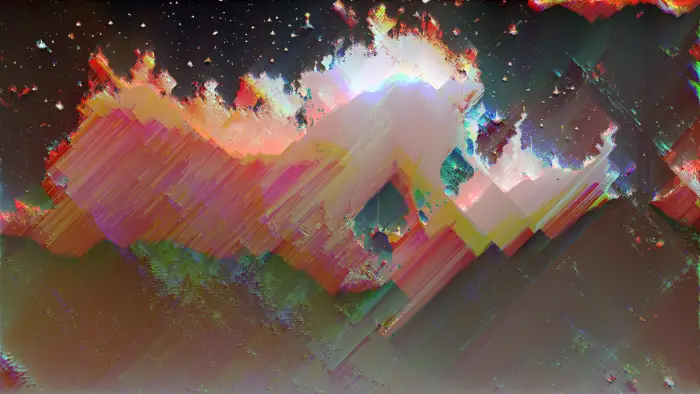
Color Banding as a Deliberate Glitch Art Technique
Everything in the section above describes banding as a problem to solve. In glitch art, every one of those mechanisms becomes a creative tool. The goal shifts from hiding quantization to amplifying it — stripping the illusion of continuous tone from digital images to reveal them as what they are: grids of numbers.
Posterization
Posterization is aggressive, deliberate banding — reducing the available color levels until the image resembles a screen print or pop art poster.
In Photoshop:
- Image > Adjustments > Posterize
- Set levels between 2 and 10 (lower = fewer colors = more extreme banding)
- Level 4–6 typically produces the most visually interesting results — recognizable imagery with clearly stepped tones
In GIMP: Colors > Posterize provides the same control. GIMP also offers Colors > Levels of quantization through the Indexed Color mode.
Posterization + glitch hybrid: Posterize first to create strong color bands, then apply pixel sorting or databending. The sharp edges between posterized bands create dramatic boundaries for sorting algorithms to work with.
Bit Depth Reduction
Reduce the image to lower bit depths for progressively more extreme banding:
| Target Depth | Colors Per Channel | Visual Effect |
|---|---|---|
| 4-bit | 16 | Subtle banding, slightly synthetic |
| 3-bit | 8 | Clear stepping, early digital look |
| 2-bit | 4 | Dramatic posterization, limited palette |
| 1-bit | 2 | Extreme — pure solid color blocks |
In hex editing, you can manipulate bit depth at the file level by zeroing out the least significant bits of color data. This produces banding that varies across the image depending on where your edits land — a more organic, unpredictable effect than uniform posterization.
Deliberate Compression Banding
JPEG compression at extremely low quality (1–10%) introduces banding alongside block artifacts, mosquito noise, and color shifting. The combination creates a distinctly “internet-aged” aesthetic.
Chain compression for maximum effect:
- Save your image as JPEG at quality 5%
- Open the result and save again at quality 5%
- Repeat 5–20 times
Each generation strips more color information. Gradients collapse into flat bands, and the 8x8 block grid becomes increasingly visible. This is a form of generational loss specifically targeting color fidelity.
Color Quantization and Palette Reduction
Reducing the total color palette forces the image to approximate all its colors with a limited set:
In Photoshop: Image > Mode > Indexed Color lets you set the total palette to any number from 2 to 256. The “Adaptive” palette option chooses the most representative colors, while “Uniform” creates mathematically regular palettes that produce more systematic banding patterns.
GIF conversion: Converting any image to GIF format forces it into a 256-color palette, producing characteristic banding in photographic content. This is why GIFs of real-world scenes always look “banded” — the format can’t represent smooth gradients with only 256 total colors.
Web-safe palette: Reducing to the classic 216 web-safe colors produces a distinctly retro, early-internet aesthetic where all gradients become aggressively stepped.
Databending for Banding

Databending an image through audio software often produces banding as a side effect. Audio effects applied to image data create characteristic color artifacts:
- EQ — Cutting or boosting frequency ranges in image-as-audio corresponds to modifying color channel intensity at specific spatial frequencies. High-pass filtering tends to flatten large areas of similar color into uniform bands.
- Audio compression (dynamic range compression, not file compression) — Reduces the dynamic range of color data, pushing similar values toward the same level and creating flattened bands.
- Bit crush effects — Directly reduce the resolution of the data, producing banding identical to bit depth reduction but applied non-uniformly across the image.
See our Audacity glitch guide for specific databending workflows.
Creative Contexts and Applications
Design and Typography
Banding adds graphic punch to design work. The flat color planes created by posterization resemble screen printing, risograph, or pop art aesthetics. Combined with glitch typography, banded backgrounds create high-contrast compositions where text sits on clean color fields interrupted by digital artifacts.
Photography and Portraiture
Selective banding — applying posterization to specific areas while preserving others — creates portraits that oscillate between photograph and illustration. Skin becomes flat color planes while eyes or hair retain photographic detail, creating visual tension between the organic and the digital.
Technique: Duplicate your image layer. Posterize the top layer aggressively (level 4–6). Add a layer mask and paint in black to reveal the original layer in areas where you want photographic detail preserved.
Animation and Video
Frame-by-frame posterization in video creates a distinct look where banding boundaries shift with each frame, producing a shimmering, unstable quality. In After Effects or DaVinci Resolve, animating the posterization level creates transitions from photorealistic to heavily banded and back.
Color quantization applied to video with a fixed palette produces temporal banding artifacts — adjacent frames may snap to different palette entries for the same color, creating flickering in areas near the quantization boundary.
Generative and Procedural Art
Processing and similar creative coding environments can generate banding procedurally:
// Processing — procedural color banding
void setup() {
  size(800, 600);
  noLoop();
}

void draw() {
  int bands = 12;
  for (int y = 0; y < height; y++) {
    float t = map(y, 0, height, 0, 1);
    float quantized = floor(t * bands) / float(bands);
    color c = lerpColor(color(20, 0, 80), color(0, 200, 255), quantized);
    stroke(c);
    line(0, y, width, y);
  }
}
This generates a gradient with visible banding by quantizing the transition into discrete steps — the same mechanism that causes banding in compressed images, made explicit and controllable in code.
Why We See Banding: The Science of Mach Bands
Human vision is remarkably sensitive to edges and boundaries — a perceptual phenomenon called Mach banding, named after physicist Ernst Mach who described it in 1865.
When two adjacent regions of slightly different brightness meet, the visual system exaggerates the boundary: the bright side appears brighter at the edge, and the dark side appears darker. This is a neural processing effect, not an optical one — it happens in the retina’s lateral inhibition network before the signal even reaches the brain.
Mach banding means that even when the actual color difference between adjacent quantization steps is tiny (RGB values of 120 and 121, for example), the eye amplifies the perceived difference at the boundary. This is why banding is visible even when the underlying data seems like it should be smooth enough — our visual system is wired to enhance exactly the kind of step edges that quantization creates.
This perceptual mechanism also explains why dithering works so effectively. Scattered noise breaks up the straight boundaries that trigger Mach band perception, and the visual system smooths the noise into perceived continuous tone instead. The noise is “invisible” because it has no coherent edges to amplify, while the banding is “visible” because it has nothing but edges.
For glitch artists, Mach banding is an ally. It means that even subtle quantization — reducing from 256 to 200 levels — can produce perceptible banding effects, because the visual system does the work of amplifying the boundaries you’ve created.
Related Techniques
- Databending — File-level data corruption that produces banding as a side effect
- Hex Editing — Direct manipulation of color data at the byte level
- Generational Loss — Repeated compression that strips color fidelity
- Pixel Sorting — Algorithmic reordering that interacts with banded color regions
- Photoshop Glitch — Manual posterization and color reduction techniques
- Color Effects — Broader color manipulation methods
- RGB Split — Color channel separation and offset
- Audacity Glitch — Audio-based databending that creates color artifacts
- Processing for Glitch Art — Procedural approaches to banding and color quantization
- After Effects Glitch — Animated banding effects in video