Video Feedback: How to Create Fractal Loops

Video feedback is what happens when a camera films its own output display — a live, recursive loop where each frame is captured, displayed, recaptured, and displayed again, dozens of times per second. The result is mesmerizing fractal-like patterns, spiraling tunnels, pulsating geometry, and organic visual chaos that responds in real time to the slightest physical adjustment.
Unlike most glitch art techniques that involve corrupting files or manipulating data, video feedback is a generative system. You’re not breaking something — you’re creating a self-amplifying visual engine from nothing more than a camera, a screen, and light. Every session produces imagery that has never existed before and can never be precisely replicated.
Video feedback was one of the earliest electronic art techniques, pioneered in the 1960s, and remains one of the most immediate and visceral ways to create moving visual art today.
How Video Feedback Works
The Core Loop
A video feedback loop is a closed circuit with three components:
- Camera captures whatever is in front of it
- Display shows the camera’s live output
- Camera recaptures the display, including the image of itself on the display
This creates infinite recursion — a picture within a picture within a picture — but with a critical difference from static recursion: time delay. There’s always a slight lag between capture and display (camera processing + signal transmission + display refresh), so each nested image is a fractionally older version of the last.
Why Patterns Emerge
The visual complexity of feedback comes from the interaction of several factors:
Amplification and decay. Bright areas get brighter with each loop iteration because the camera keeps adding their light values. Dark areas stay dark or drop out entirely. This creates a natural contrast between active “hot zones” where patterns evolve and quiet regions that remain stable.
Geometric transformation. The camera never sees the display at exactly 1:1 scale or perfectly aligned. Even tiny differences in zoom, angle, and position mean that each recaptured frame is slightly scaled, rotated, or shifted relative to the last. Over dozens of iterations per second, these micro-transformations compound into spirals, tunnels, and fractal branching.
Color shifting. Differences between the camera’s color response and the display’s color output mean colors drift with each pass through the loop. Whites may warm toward yellow; blues may shift toward cyan. This chromatic drift creates the rainbow halos and color cycling characteristic of feedback imagery.
Noise accumulation. Every component in the chain adds subtle electronic noise — sensor noise from the camera, display refresh artifacts, signal interference. This noise gets re-amplified each cycle, seeding new patterns and preventing the system from ever reaching a static equilibrium.
The Mathematics Behind It
Video feedback is closely related to iterated function systems — the same mathematics that generates the Mandelbrot set and other fractals. Each frame applies a transformation (scale, rotate, translate, color shift) to the previous frame, then feeds the result back in. The visual patterns you see are the attractors of this dynamical system — the stable geometric structures that emerge from repeated transformation.
This is why feedback produces fractal-like imagery without any programming or computation. The physics of the system is the algorithm.
Equipment and Setup
Minimal Hardware Setup
You need exactly three things:
- A camera — Webcam, camcorder, CCTV camera, DSLR with live video output, or even a phone with HDMI output
- A display — Monitor, TV, or projector
- A connection — HDMI cable, composite video cable, or capture card routing
Connect the camera output to the display input, point the camera at the display, and you’ll immediately see the recursive tunnel effect.
Analog Setup (Camera + CRT)
The classic video feedback rig uses an analog camera and a CRT television. This combination produces the softest, most organic-looking results because:
- CRT phosphors glow and fade gradually, creating natural motion blur and light trails
- Analog signals introduce subtle color drift and signal noise that seed rich patterns
- The curved glass of a CRT adds optical distortion that feeds into the geometry
- There’s less processing delay than digital systems, allowing faster, more fluid response
Recommended analog setup:
- A consumer camcorder with composite (RCA) video output — thrift stores often have these for a few dollars
- A CRT television with composite input
- A yellow RCA cable (composite video)
- A tripod for the camera
Connect camera output to TV input, set the TV to the correct video input channel, point the camera at the screen, and adjust until patterns appear.
Digital Setup (Webcam + Monitor)
A modern all-digital approach using a webcam and LCD monitor:
- Connect a USB webcam to your computer
- Open a camera preview application (OBS Studio, Photo Booth, or any webcam viewer) in full screen
- Point the webcam at the monitor showing its own preview
- Adjust position, zoom, and angle
Digital setups introduce more processing delay than analog, which creates distinct stepped, geometric patterns rather than analog’s smooth flows. The pixel grid of LCD displays also contributes sharp moiré patterns and grid-like structures.
Software webcam tools for feedback:
- OBS Studio (free) — Full-screen camera preview with optional effects
- ManyCam — Virtual camera with built-in effects
- Processing or p5.js — Write custom feedback loops with per-pixel control (see software section below)
Projector Setup
Using a projector instead of a monitor creates unique opportunities:
- Larger feedback field — The projected image can be room-sized, allowing you to physically walk into the feedback loop
- Surface interaction — Project onto textured walls, fabric, or curved surfaces for distorted feedback geometry
- Environmental blending — Ambient light, shadows, and physical objects in the projection area become part of the loop
- Performance scale — Projector feedback works as live installation art in ways that monitor setups can’t
The tradeoff is that projectors typically have more processing delay and lower refresh rates than monitors, making the feedback slower and more “stepped” in its evolution.
Core Techniques for Controlling Feedback
Once your loop is running, small physical adjustments produce dramatic visual changes. Feedback is an instrument — you play it with your hands.
Camera Position and Angle

- Centered, straight-on — Produces symmetrical tunnels converging on a central vanishing point. The most stable configuration.
- Slight horizontal tilt — Creates spiraling vortices that rotate in the direction of the tilt. Clockwise tilt produces clockwise spirals.
- Vertical tilt — Generates cascading, waterfall-like patterns that flow up or down the screen.
- Off-center framing — The vanishing point moves to one side, creating asymmetrical spiral arms and more complex, less predictable geometry.
- Extreme angle — When the camera is nearly perpendicular to the display, feedback becomes a thin, intense band of light that can be shaped into letter forms and linear structures.
Zoom and Focus
- Zoom in — Magnifies the center of the feedback, pushing the vanishing point past the edges of the frame. Creates exploding, outward-flowing patterns.
- Zoom out — Shows more of the recursive nesting. Creates inward-flowing tunnels with visible layers.
- Sharp focus — Produces crisp, latticed geometry with fine detail. Patterns tend toward angular, crystalline structures.
- Soft focus — Blurs each iteration, creating cloud-like, nebular masses. Colors blend more smoothly and patterns become organic rather than geometric.
- Rack focus (slowly shifting between sharp and soft) — Creates breathing, pulsing transitions between structured and amorphous states.
Lighting and Seeding
The feedback loop amplifies whatever is in the camera’s field of view. You can “seed” patterns by introducing external elements:
- Colored lights — LEDs, gels, phone screens, or colored objects near the display introduce chromatic seeds that the loop amplifies into color structures
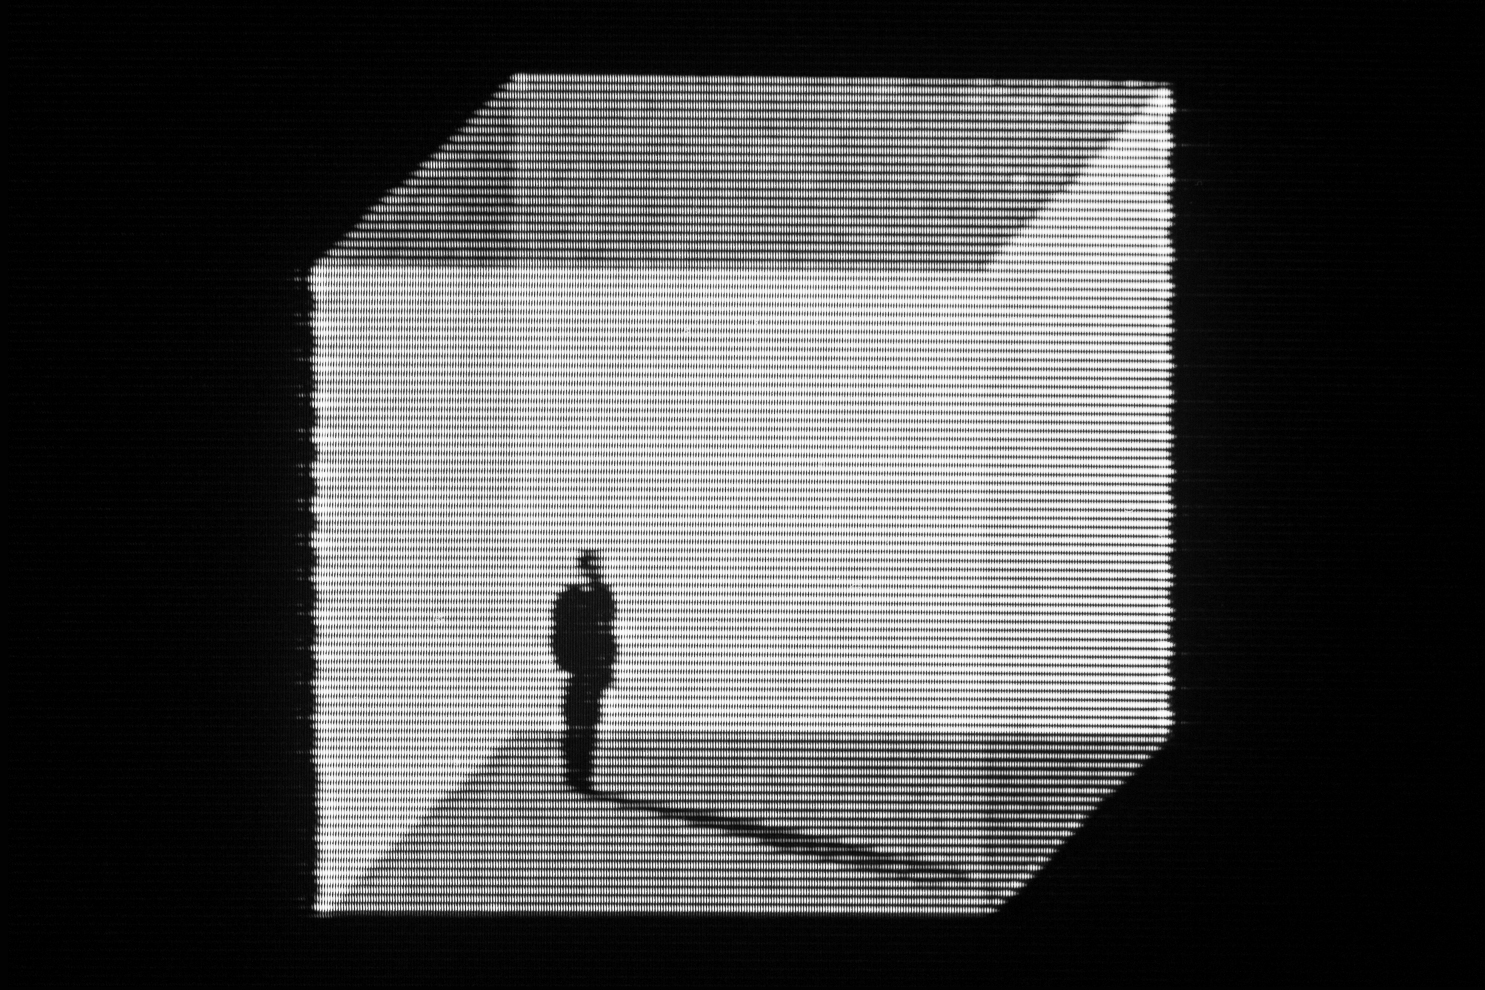
- Hands and objects — Placing your hand between camera and screen creates silhouettes that get recursively nested into the pattern. Reflective objects create point-source seeds.
- Flashlight or laser pointer — A single bright point becomes a spiraling streak of light as the feedback loop transforms and duplicates it
- Text or images — Hold printed text, drawings, or small images in front of the camera to embed recognizable elements into the abstract feedback
Brightness and Contrast
This is the most critical control for preventing the loop from blowing out into white noise:
- High brightness = fast amplification. The loop quickly saturates into hot white halos and flares. Useful for explosive, short-lived bursts.
- Low brightness = slow, controlled evolution. Patterns develop gradually with more visible internal detail. Best for sustained, evolving compositions.
- High contrast = sharp boundaries between light and dark zones, producing geometric structures with hard edges.
- Low contrast = soft, flowing gradients. Patterns merge and blend like watercolors.
Rule of thumb: Start with display brightness at 50% or lower and camera exposure slightly underexposed. Increase gradually until patterns begin to self-sustain without immediately saturating.
Software-Based Video Feedback
You don’t need physical hardware to create feedback. Software environments can simulate — and extend — the feedback loop with precision impossible in physical setups.
Processing / p5.js
Processing and its JavaScript sibling p5.js are ideal for building custom feedback systems. The basic approach:
// Processing sketch — basic video feedback
import processing.video.*;

Capture cam;

void setup() {
  size(640, 480);
  cam = new Capture(this, 640, 480);
  cam.start();
}

void draw() {
  if (cam.available()) {
    cam.read();
  }
  // Scale down slightly and blend with previous frame
  pushMatrix();
  translate(width/2, height/2);
  scale(0.98);
  rotate(0.01);
  translate(-width/2, -height/2);
  tint(255, 250); // slight fade
  image(get(), 0, 0);
  popMatrix();

  // Draw current camera frame at reduced opacity
  tint(255, 40);
  image(cam, 0, 0);
}
This creates a software feedback loop where each frame is slightly scaled, rotated, and faded before the next camera frame is composited on top. Adjusting the scale, rotate, and tint values dramatically changes the visual output.
TouchDesigner
TouchDesigner is the professional standard for real-time visual feedback systems. Its node-based workflow makes feedback loops intuitive:
- Create a Video Device In TOP (camera input)
- Create a Feedback TOP
- Route the Feedback TOP through Transform (scale, rotate) and Level (brightness, contrast) TOPs
- Composite the camera input over the transformed feedback
- Route the composite back into the Feedback TOP
TouchDesigner’s GPU-accelerated rendering handles high-resolution feedback at 60fps without the latency issues of physical setups. It also allows effects impossible in hardware — per-pixel color manipulation, displacement mapping within the loop, conditional feedback that responds to audio input.
Hydra (Browser-Based Live Coding)
Hydra is a free, browser-based live coding environment for video synthesis that handles feedback naturally:
// Hydra feedback with rotation and color shift
src(s0)
  .scale(0.99)
  .rotate(0.01)
  .color(1.01, 1.0, 0.99)
  .blend(src(s0), 0.95)
  .out(s0)
Hydra runs entirely in the browser with no installation required, making it the fastest way to experiment with software feedback.
VJ Software (Resolume, VDMX)
VJ applications designed for live performance include feedback as a built-in feature:
- Resolume Arena/Avenue — The feedback effect can be applied to any layer with controls for zoom, rotation, brightness, and color shift
- VDMX — Syphon-based routing allows complex feedback chains with effects inserted into the loop
These tools excel at live performance contexts where feedback visuals need to respond to music and mix with other video sources.
Advanced Techniques
No-Input Mixing
No-input mixing creates feedback without a camera by routing a video mixer’s output back into its own input. With no external source, the mixer amplifies its own internal noise into structured patterns.
The technique works best with analog video mixers that have manual controls for color, brightness, and keying. Adjusting these parameters shapes the noise into bands, grids, oscillating color fields, and rhythmic flicker patterns.
No-input mixing connects video feedback to the audio world — musicians have long used no-input mixing boards to generate sound from self-amplifying electronic noise. The visual version applies the same principle to video signal.
Feedback Through Effects Chains
Inserting processing between the camera and display transforms the feedback character:
- Color effects in the loop create progressive color cycling — each pass shifts the hue, building rainbow gradients over time
- Inversion (negative image) creates rapid alternation between positive and negative, producing strobing, high-contrast patterns
- Edge detection filters emphasize the boundaries of feedback structures, creating wireframe or line-drawing versions of the spirals and tunnels
- Pixel displacement or wave effects warp the geometry of each iteration, creating fluid, undulating feedback that flows like water
Multi-Camera and Multi-Screen
Using multiple cameras and displays creates feedback networks rather than simple loops:
- Camera A films Display B, Camera B films Display A — Creates cross-coupled feedback where two loops influence each other
- Camera films two displays simultaneously — Merges two feedback streams into one hybrid pattern
- Split-screen feedback — One camera’s output appears on multiple screens positioned at different angles, with the camera capturing all of them
History and Artists
Video feedback has a rich artistic lineage stretching back to the dawn of electronic art.
Pioneers
Nam June Paik (1960s–2000s) is credited with some of the earliest deliberate use of video feedback in art. His installations featured banks of CRT monitors displaying manipulated and recursive video signals, establishing video feedback as a legitimate artistic medium.
Steina and Woody Vasulka developed video feedback as a core element of their practice throughout the 1970s and 80s. Their work “Noisefields” (1974) and related pieces used analog video processors and feedback to create abstract, responsive electronic landscapes. They treated video signal as a sculptural material to be shaped and transformed.
Dan Sandin built the Sandin Image Processor in the early 1970s — an analog video synthesizer specifically designed for real-time manipulation, including feedback routing. The instrument influenced a generation of video artists and established the engineering principles behind hardware video feedback.
Stephen Beck created the Beck Direct Video Synthesizer in 1970, one of the first instruments to generate video patterns entirely from electronic signals, including feedback configurations.
Contemporary Practice
Video feedback remains active in contemporary art and performance:
- VJ culture uses feedback as a real-time visual performance tool, often synchronized to music at clubs and festivals
- Installation artists build large-scale feedback environments that audience members can interact with physically
- Live coding practitioners use Hydra, Processing, and custom software to create feedback systems that are simultaneously the artwork and the instrument
- Circuit bending practitioners route video feedback through modified hardware for hybrid analog-digital chaos
Capturing and Recording Feedback
Feedback is inherently live and ephemeral. Capturing it well requires some planning.
Recording Methods
- Direct capture card — The cleanest method. Tap the video signal before it reaches the display (or use a splitter) and record to a capture device. This avoids filming the screen and preserves full signal quality.
- Camera recording — If using a camcorder, many can output to display and record simultaneously. Check your camera’s manual for “through” or “pass-through” monitoring modes.
- Screen recording — For software-based feedback, screen recording (OBS, QuickTime) captures the output at full digital quality.
- Filming the screen — The simplest but lowest quality approach. Use a second camera to film the display showing the feedback. This adds moiré patterns and ambient reflections, which some artists embrace as additional texture.
Post-Processing
Raw feedback footage can be used as-is or further processed:
- Apply datamoshing to feedback recordings for layered corruption
- Run through pixel sorting to add algorithmic structure to organic feedback shapes
- Add RGB channel separation to enhance the color drift already present in feedback
- Layer multiple feedback recordings with different blend modes for composite pieces
- Use as displacement maps in After Effects or other compositing software to apply feedback-like warping to other footage
Troubleshooting
”I just see a white or black screen”
White screen: Brightness is too high. The loop has saturated — every pixel has been amplified to maximum. Lower display brightness, reduce camera exposure, or increase the distance between camera and screen.
Black screen: The camera isn’t seeing enough light to sustain the loop. Increase display brightness, add ambient lighting, or seed the loop with a flashlight or LED.
”The image is stable — no patterns are evolving”
The camera and display are too perfectly aligned. Feedback needs slight misalignment to generate complexity. Try: rotating the camera a few degrees, zooming slightly in or out, or shifting the camera off-center.
”Patterns appear but they’re too chaotic to control”
Reduce the feedback gain by: lowering display brightness, increasing the distance between camera and screen, or adding a neutral density gel/filter to the camera. You can also defocus slightly to smooth out high-frequency detail.
”Colors are muddy or washed out”
The color response of your camera and display aren’t well matched. Try adjusting the display’s color temperature, saturation, or individual RGB levels. For analog setups, inserting a color corrector or video processor in the signal chain gives more control.
”There’s a visible delay/stepping in the patterns”
Digital processing latency. Each device in the chain adds delay. To reduce it: use a direct analog connection where possible, reduce the processing resolution in software setups, or enable “game mode” on digital displays to minimize their internal processing delay.
Related Techniques
- Video Glitch — Overview of all video glitch methods
- Circuit Bending — Hardware modification for unpredictable output
- VHS Effects — Analog video distortion techniques
- Datamoshing — Codec-level video corruption
- After Effects Glitch — Digital motion graphics glitch effects
- Generational Loss — Degradation through repeated processing
- RGB Split — Color channel separation
- Processing for Glitch Art — Creative coding for visual experiments